
I have been asked by multiple people about my framing process. I know my process probably isn’t the best out there. But they are beautiful, strong and it’s a lot less expensive then having custom frames built each time I want to display work somewhere.
First you will need to get all of your tools and supplies. I will share what I use but multiple tools can do similar jobs.
Tools:
Miter saw
Clamps
Router (1/2 inch straight cutting bit, and 45-degree chamfer bit)
Staple gun
Adjustable Band clamp
1/4 sheet sander
120 Grit sandpaper and 220 grit sandpaper
Clean Rags
Foam brushes
Drop cloth
Plexiglass scoring tool
Drill (or screwdriver)
Pencil
Supples:
1×4 or 1×6 wood ( by however long you will need)
Chipboard
Plexiglass
Plyboard (the thinnest you can find)
Wood glue
Wood filler
Stain
Polyurethane
1/2 Inch Staples
Frame picture turn buttons
D ring hangers
Hanging wire
Awesome now to get started!
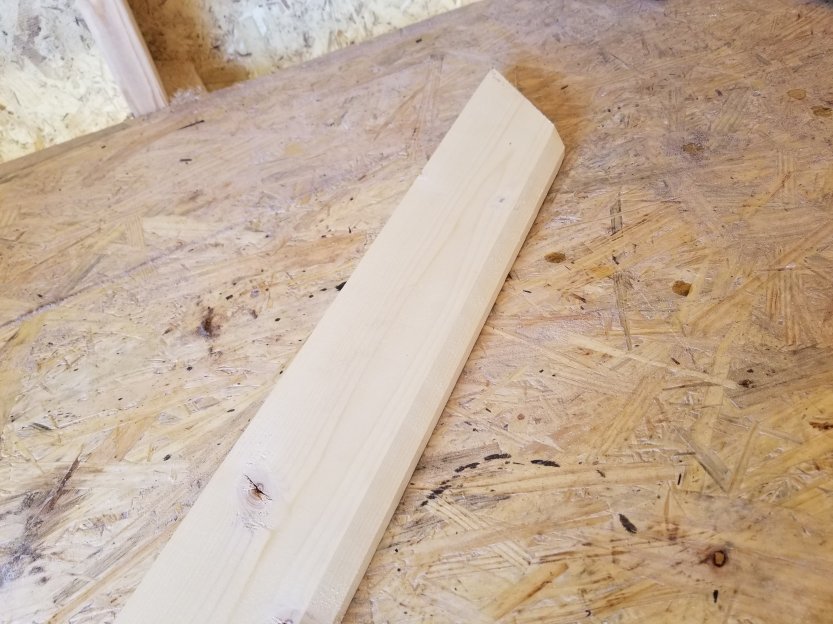
First I adjust my miter saw to make a 45 degree cut. I get my 1×6 or 1×4 wood( I like the wider wood for my larger peices) and cut one of the ends to a 45 degree cut. I then measure the inside to one inch less than the piece I am framing.
For this example, let’s say we are framing an 8×10 picture. So after I make the first cut, I will measure the inside angle to 7 inches. And then measure a second time just to be sure. And then cut another 45 degree cut.

I then use that piece to measure my next cut. I lay that piece on top of the wood that needs to be cut and I mark…check it twice, and cut there.

I then repeat for my other length making sure that it is one inch shorter than my art piece that I’m framing. I would cut 9 inches for a 10 inch art peice. So for an 8×10 art peice I want my inside dimensions to be 7×9.
Once all four of my pieces are cut, I will then use my router with my 45-degree chamfer bit.
I will use the chamfer bit on the front side of the frame. I like to look at both sides of the wood to see which side looks better. I don’t have a router table. So I clamp both sides of the wood on the very tips of the outer corners. I then use the router on the better looking side of the wood on the inside edge.

I then dry fit all of the pieces together to check my angles and measure one more time before I glue.
Then I glue the corners together, put adjustable band clamp around it. I tighten it up and make sure all the corners stay together good as I tighten.

I let the glue dry at least an hour.
While it is drying, I measure twice and cut my chipboard the same size as my art. Or in this example, I would cut it to 8×10 inches.
I then cut the plywood into 5 1/2 inch strips (if I’m usin 1×4 wood) or 6 1/2 inch strips( for 1×6 wood). Using those strips, I make 45-degree cuts to make triangles.

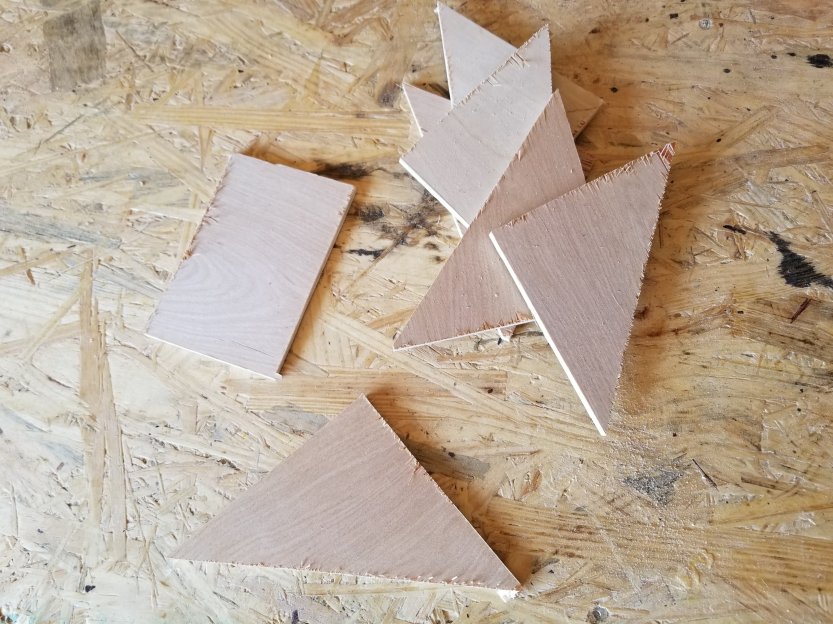
They don’t have to be perfect. I then sand the edges so that they aren’t sharp.
After my frame has dried at least an hour, I flip it over and and use the chip board that I have cut out and lay it on the back. Center the chipboard over the hole and then trace around it with a pencil. Staple the corners but don’t staple inside the line you just made.

Next I use the router with the straight bit. I like to hold my chipboard with my plexiglass right on my router to make sure that I get the exact depth for my inside lip. When I’m done I want everything to lay perfectly level across the back.
I then use the router and cut out the wood up to the line around the inside. This makes a lip to hold the plexiglass, art, and chipboard.

Now I get the triangles that I cut out of the plywood. I put glue on one side then put it over a corner. Making sure not to go over the router edge and not quite to the outer edge of the frame. Then I staple it down.

Using my wood filler I fill in any holes and seams on the corners.
I then use my electric sander with my rougher sandpaper (120 grit) and I go over the entire frame. I make sure that the corners are perfectly smooth and that I get all glue residue and excess wood filler. I then go over the entire frame again with a finer grit (220 grit) sandpaper.

When the sanding is completed. I clean my workspace and use a rag to wipe all the sawdust off of my frames. The staining and finish will turn out best if they have no dust residue.
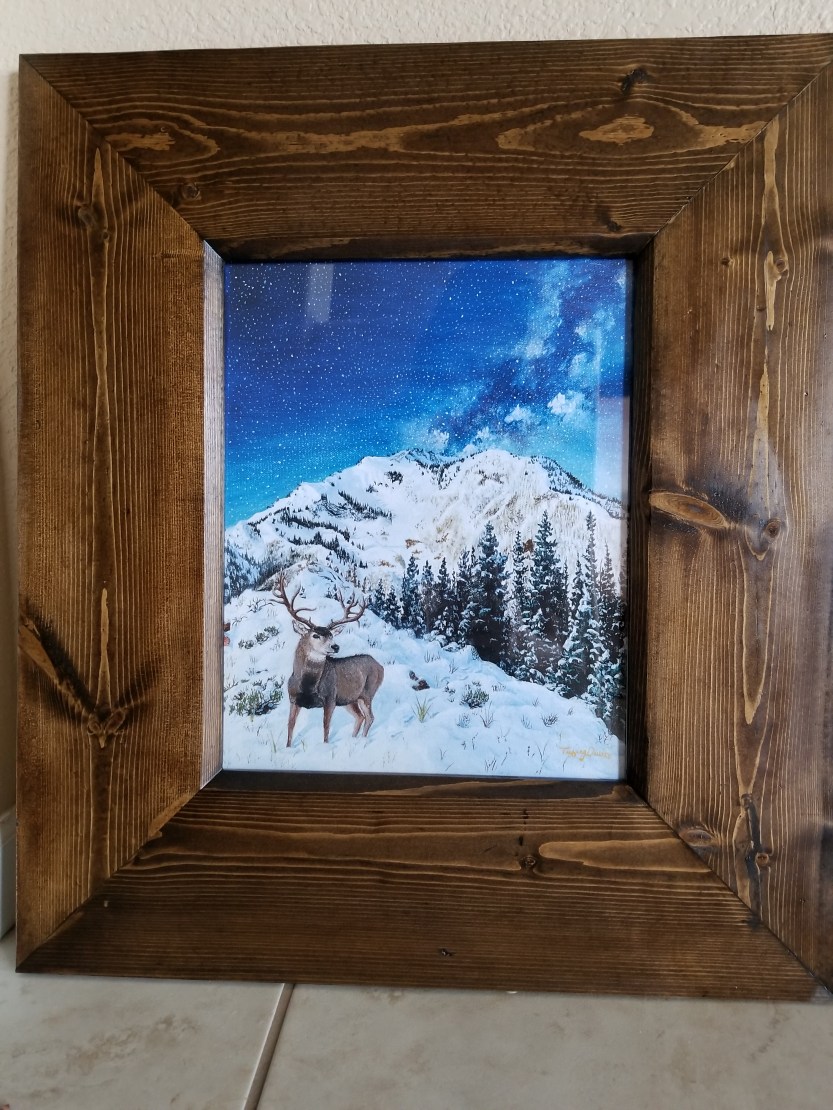
I put my drop cloth on the table. Then I stain the frame with a foam brush. I make sure to lift the frame and apply the stain to the outside edges of the triangles on the back. I then let the stain sit for 5 to 15 minutes, depending on how dark I want the colors. Do not let the stain dry on the wood. With a clean cloth I wipe the excess off.

Then I let it dry for an hour and apply another coat or dry for eight hours and apply the polyurethane.

Let the polyurethane dry for eight hours.
Between all these dry times I like to cut my plexiglass.
To cut the plexiglass I measure it to the same size as the art. I then like to use a straight peice of wood, place it on top of the plexiglasss right along where I want the plexiglass cut, then clamp it down along the edge of a table.

Using my scoring tool, I score along my line using the wood as my guide. I score it at least five times to make sure that it will break along where I want it to. I then lean on the part that I’m breaking off. It should break off cleanly. If it doesn’t I will score it more then use pliers to break off the extra. When I’m done, I clean both sides of the plexiglass.
Cutting the plexiglass can be frustrating sometimes. Sometimes it just doesn’t break where you want it too. Or the scoring tool can slip and scratch where you don’t want. If I can, I prefer to buy it from Lowe’s because they will cut it for you.
Once the frame is dry, I put it all together. I lay the plexiglass in, then the art, and last the chipboard. I then drill in at least two turn buttons on each side. With my largest prints I do up to 6 turn buttons on the long sides.
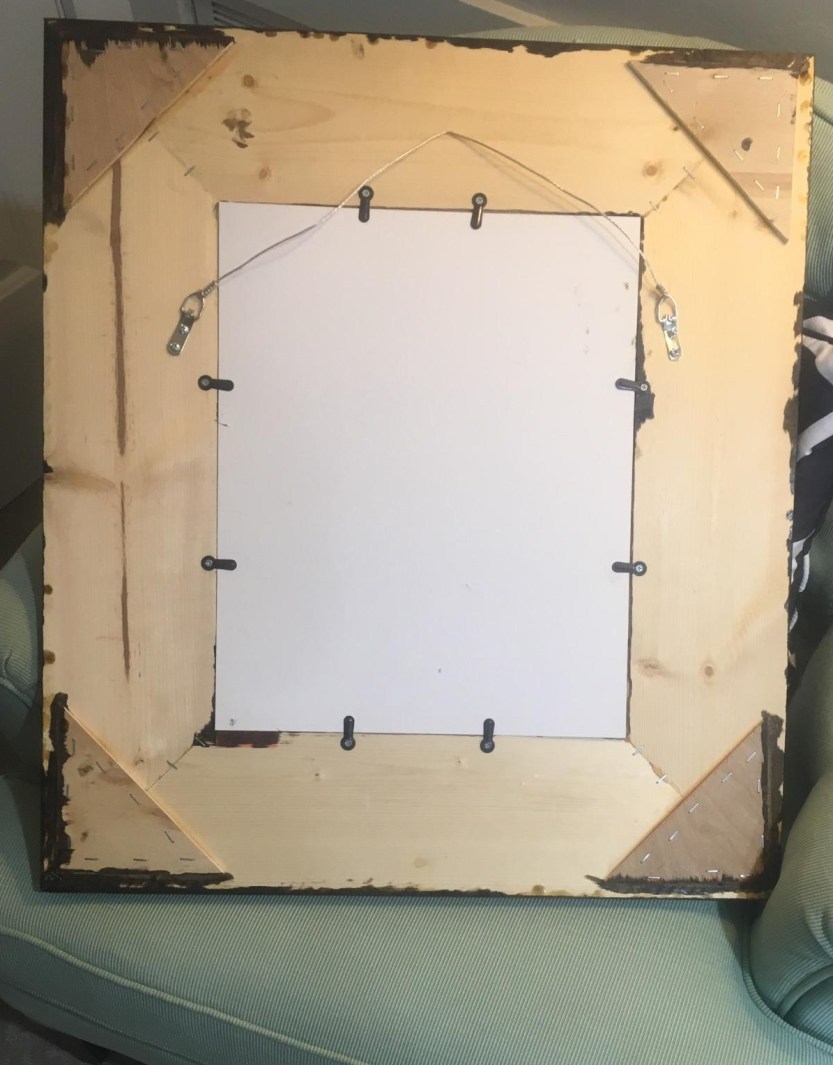
Last I need to connect the d hooks. Each frame needs two. The d hooks need to be towards the top and slightly tilted in towards the center. Screw them in. Connect them with the picture wire. Being sure to tie the wire in the correct knots so that they don’t come undone.

And finally it is done!
Categories: Uncategorized
